Mastering Workflow Automation in GeoWeaver
- Jyoshmitha Reddy Paturi
- March 12, 2025
In this blog, we’ll explore how to create and execute workflows in GeoWeaver to automate complex analysis pipelines.
Steps to Create and Execute Workflows in GeoWeaver
Step 1: Add Processes to Your Workflow
Click on the processes you want to include in your workflow.
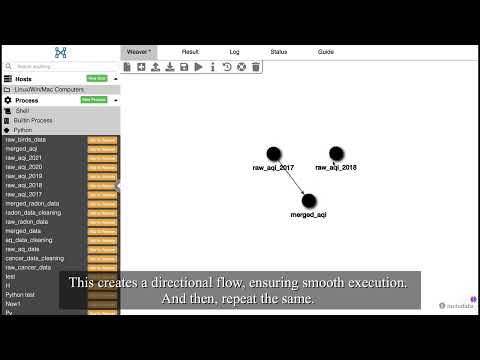
Step 2: Define Execution Order
Hold Shift, then click and drag from one process to another to create a directional flow.
Step 3: Run Your Workflow
- Click the Run icon at the top.
- A popup will appear; enter a unique workflow name and description.
- Click Confirm and select execution settings.
- Choose Local Host from the dropdown and pick a suitable environment.
- Enter your password set up during GeoWeaver installation, then confirm execution.
Step 4: Monitor Workflow Execution
- Blue: The process is waiting.
- Yellow: The process is running.
- Green: The process has successfully finished.
- Red: The process has failed.
Step 5: Verify Completion
Once all nodes turn green, your workflow has successfully executed!
Conclusion
GeoWeaver is a powerful tool for geospatial analysis, making workflow automation seamless and efficient. Check out the full video below to explore these functionalities in detail.